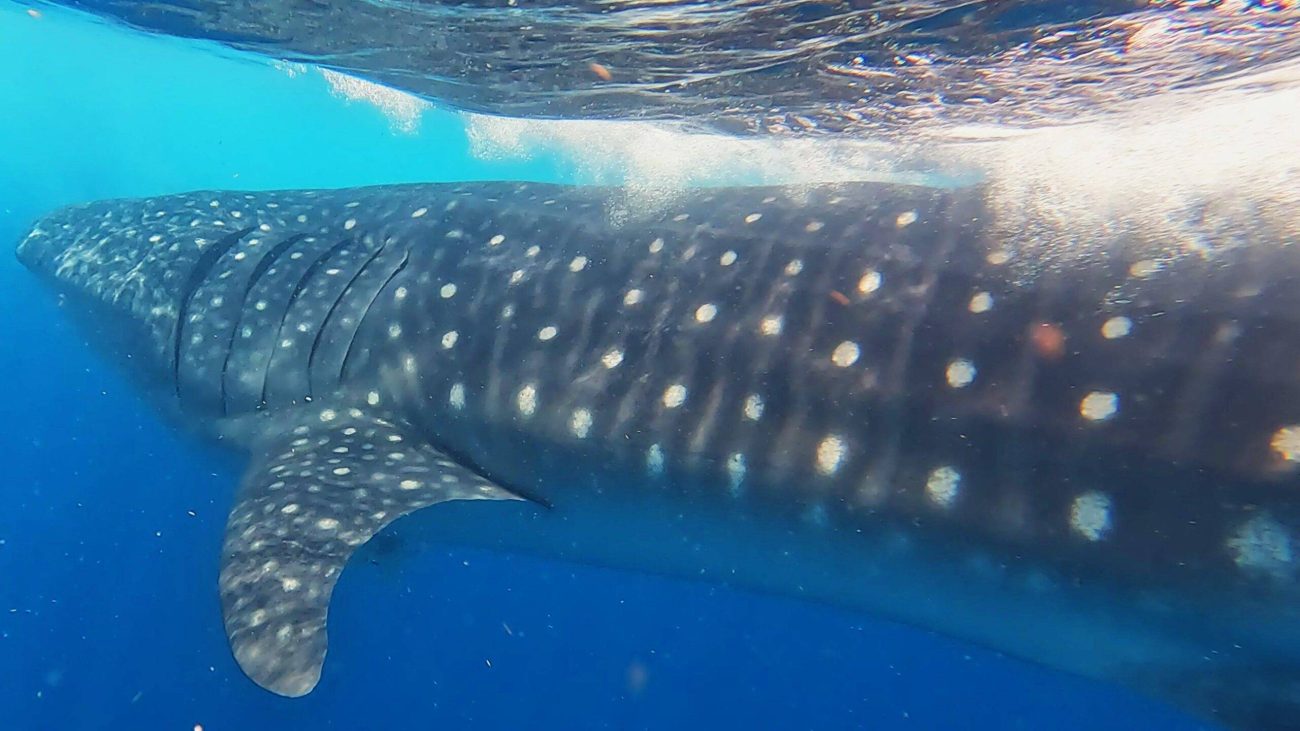
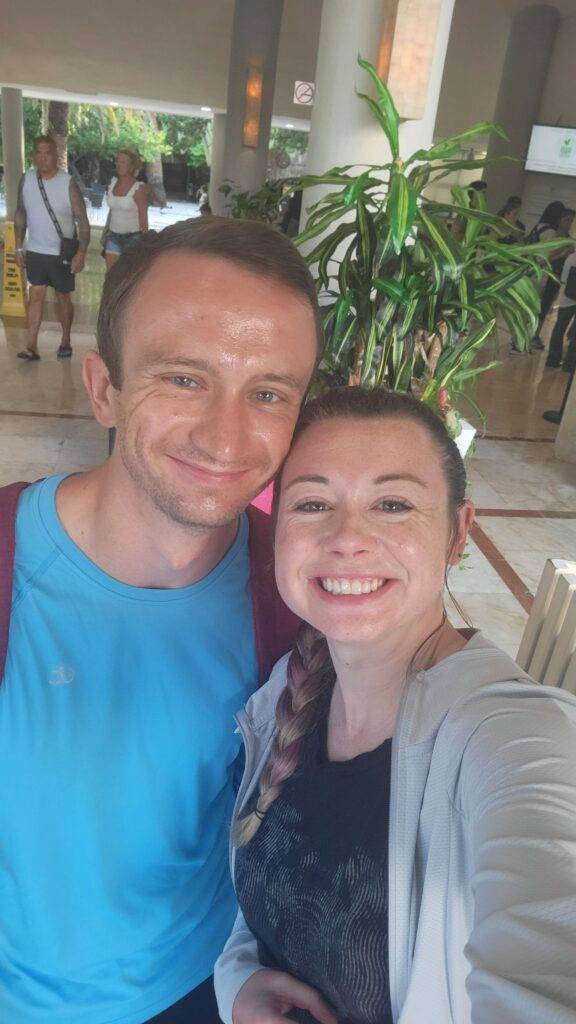
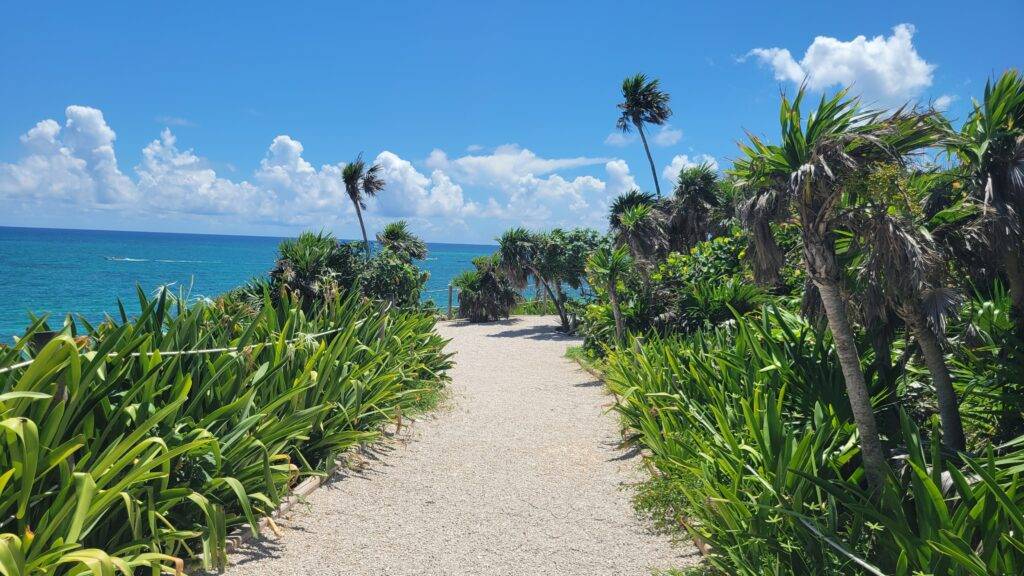
Hola, amigos! It’s been over a decade since my last trip to Mexico, but Daniel and I finally crossed the border to visit Playa del Carmen last week! The trip was far too short, but we packed in plenty of fun, including snorkeling with whale sharks and a fun day with Aventuras Mayas on their popular Tulum Xtreme tour!
The Tulum Xtreme tour is a whirlwind combination of snorkeling in a cenote, ziplining through the jungle, rappelling, and visiting the ancient Mayan ruins of Tulum. With such a fantastic variety of activities, it’s an excellent option for history buffs, thrill seekers, and nature lovers!
Several companies in the Riviera Maya area are advertising a Tulum Xtreme tour, which can make it a bit hard to know what to expect, especially since information on all of these tours is somewhat limited beyond their websites. So today, I want to share our experience with Aventuras Mayas, giving you insights into the transportation process, each activity, and how to prepare.
If you’re ready to dive into this epic adventure, let me guide you through an unforgettable day on the Tulum Xtreme Tour!
More About Aventuras Mayas
Aventuras Mayas is a Mexican-founded and operated company that emphasizes ecotourism and sustainability. Each tour is conducted in small groups with a dedicated guide, so you can enjoy the experience without the big crowds you’ll find in many other places in the area.
They offer a variety of tour options that mix and match snorkeling, cenotes, ziplining, ATVS, rappelling, and the Tulum ruins. Prices vary based on the tour you choose and whether you’re coming from Riviera Maya or Cancun, but each package includes round-trip transportation, a buffet lunch, a bilingual guide, clean facilities and lockers, medical insurance, and your chosen activities.
Transporation for Tulum Xtreme
The day before our tour, we received a message with our pick-up details, instructing us to be ready at 7:40 am. We were picked up directly from our hotel in Playa del Carmen, about an hour from the central Aventuras Mayas hub.
When the van arrived, our guide, Ivan, called our names from his pick-up list. That gave me a lot of peace of mind, and I would caution you about getting in a van with any tour that does not already have your name on their list. There are a lot of tourist scams in this area, and they will often ask you who you’re waiting for and then try to convince you that they were sent instead.
The pick-up van was very clean and comfortable, with great A/C. They even had a fully stocked cooler with plenty of bottled water for us.
We drove about 20 minutes down the road with a few other tourists to an Aventuras Mayas hub. There, we used the restrooms (which were notably clean and beautiful) and had the option to grab some coffee and breakfast pastries before dividing into our various tour groups.

It turned out that we were the only people with Ivan for the day, so once we were ready, we hopped back in the van, and he took us to the main Aventuras Mayas location. He was a very safe driver, and we felt completely comfortable with him behind the wheel.
The Tulum Xtreme Tour
Tulum Xtreme Cenote Snorkeling
The order in which you do your activities may vary by the day, but the first thing on our list was swimming in the on-site cenote.
Prepping for the Cenote
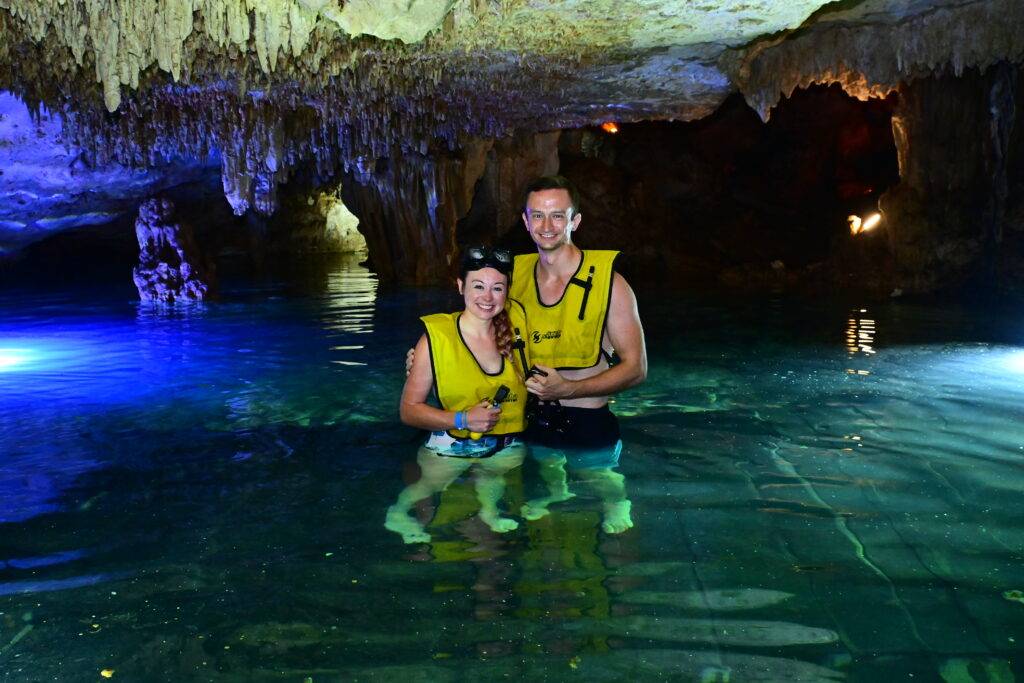
Ivan gave us plenty of time to change into our swimsuits and showed us how to use the lockers before we headed down to their cenote. It’s important to note that you cannot wear sunscreen when you enter the cenote because the chemicals are harmful to the environment, and some locals drink water from the cenote systems. However, the cenote here is covered in an underground cave, so that shouldn’t be an issue.
Before entering the cenote, Ivan gave us life vests and a snorkeling mask. However, snorkels were not provided, which did throw me off a little.
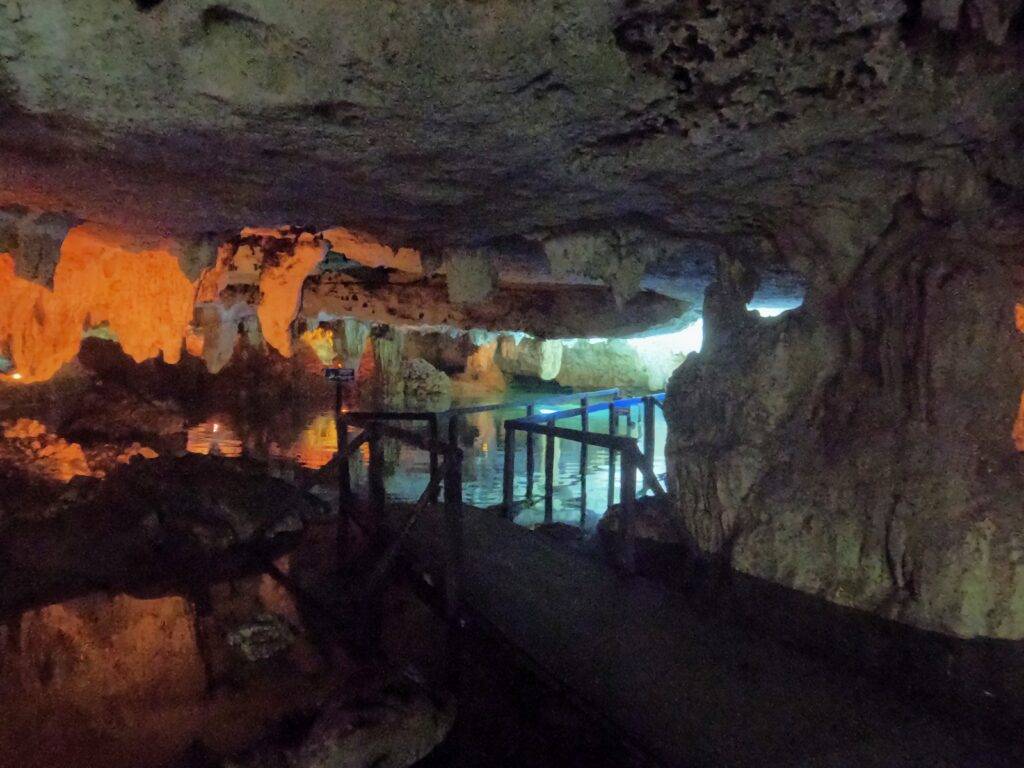
We entered the cenote by descending a set of wooden stairs, which led directly to the mouth of the cave. They’ve built it up just enough for guests to safely enter the water and create lighting systems so you can see the cool rock formations in the cave. There were also some wooden cubbies to store our flip-flops and towels while we snorkeled.
Exploring the Cenote
Once we entered the cenote, however, it was like we’d stepped into another world! The floor and ceiling were covered in stalagmites and stalactites, as well as the roots of trees that had broken through the rock to reach the fresh water below. The cenote water is also clear and refreshingly cool, creating the perfect opportunity to explore this underground ecosystem. But be warned, there are also quite a few fruit bats flittering around the cave ceiling. They keep to themselves, but I know that could be a big “no” for many people.
Once we entered the water, we stopped for a few quick pictures with a photographer, and then Ivan led us on a short tour through the cave. It’s very important that you watch your head and feet so you don’t bump into the rock formations, as you risk damaging them. However, I do have to say this can get a little tricky in places, and I conked my head pretty good on a stalactite when I came up for air. But Ivan was good about guiding us through the clearest path and warning us about upcoming obstacles.
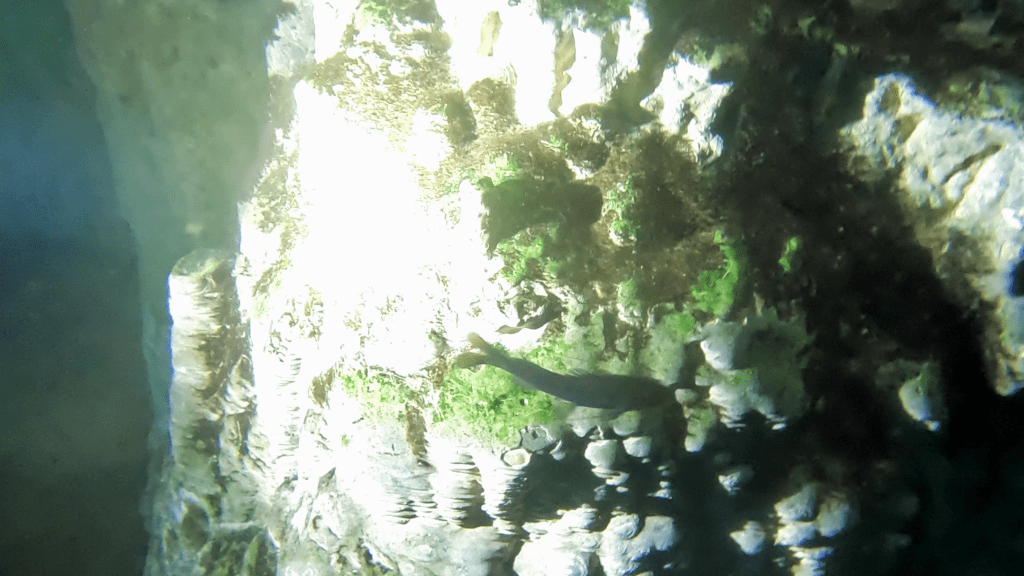
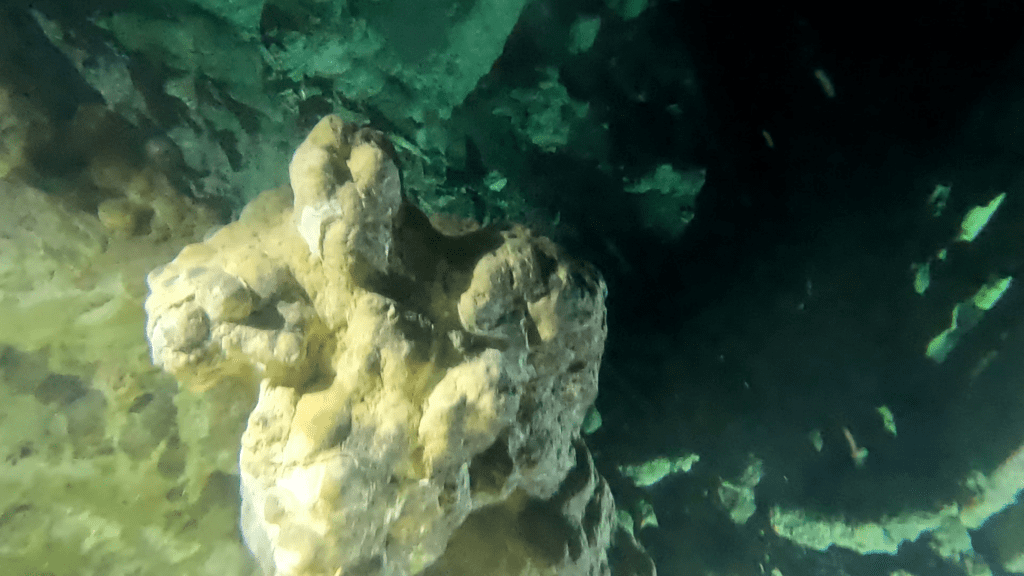


Aventuras Mayas has a good lighting system in the cave so that you can see pretty well underwater. There aren’t many fish beyond small catfish, but the stalagmites look cool, and the places where it fades to black are pretty creepy!
This part only lasts about 20 minutes, but it’s really fascinating!
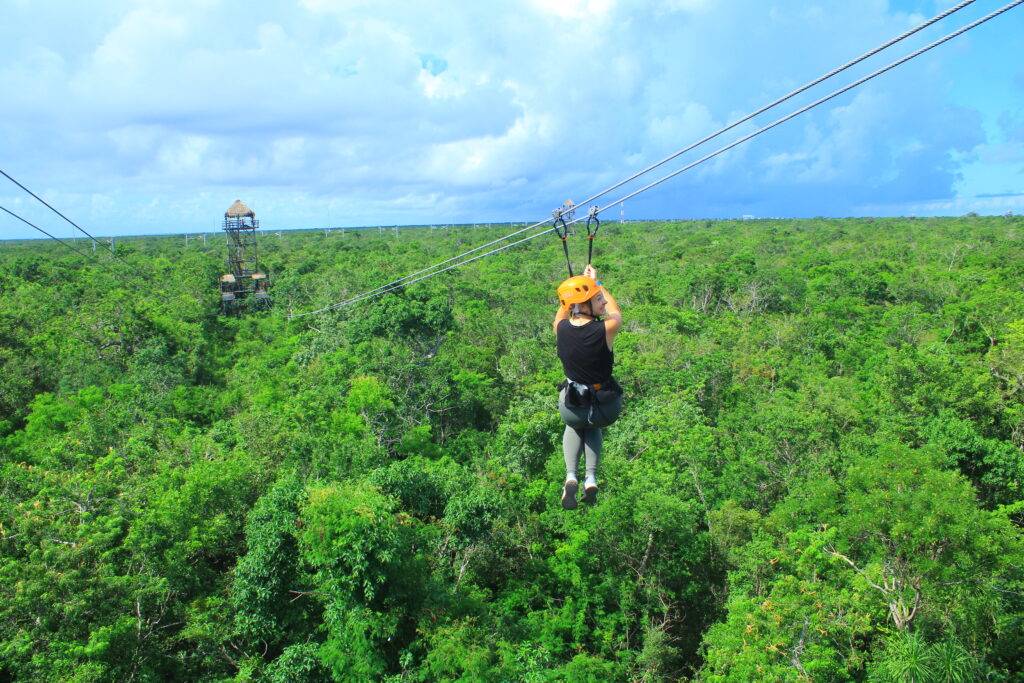
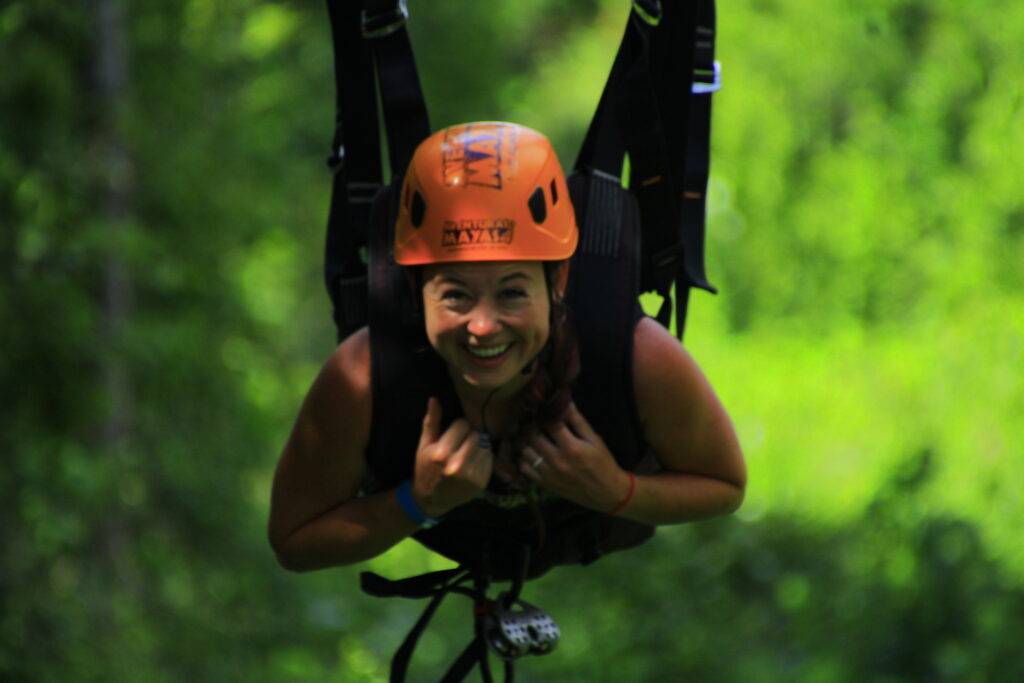
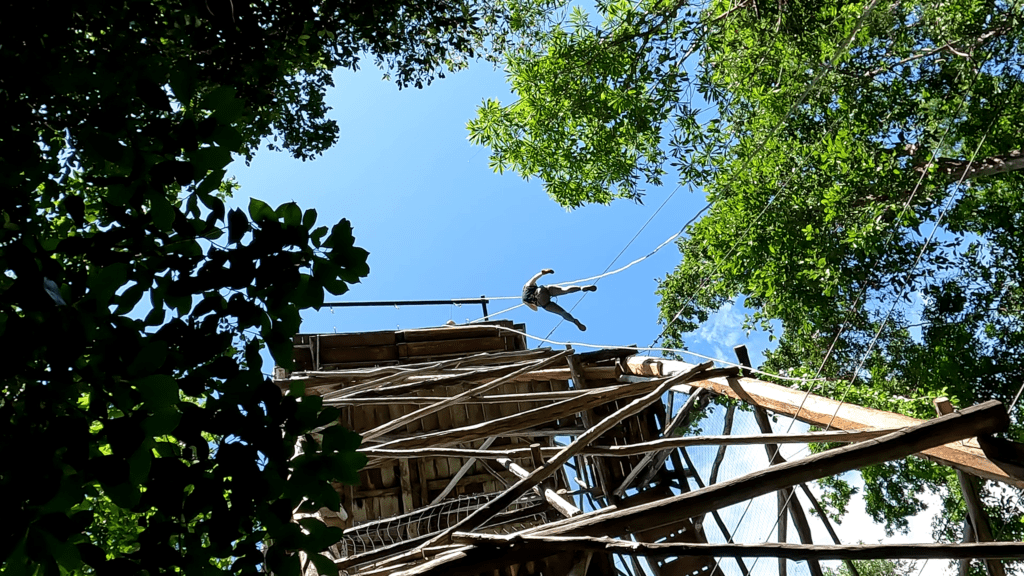
Tulum Xtreme Ziplining and Rapelling
After we’d dried off and changed from the cenote, Ivan led us to the ziplines. Aventuras Mayas has a short series of ziplines that take you flying over the jungle in various ways!
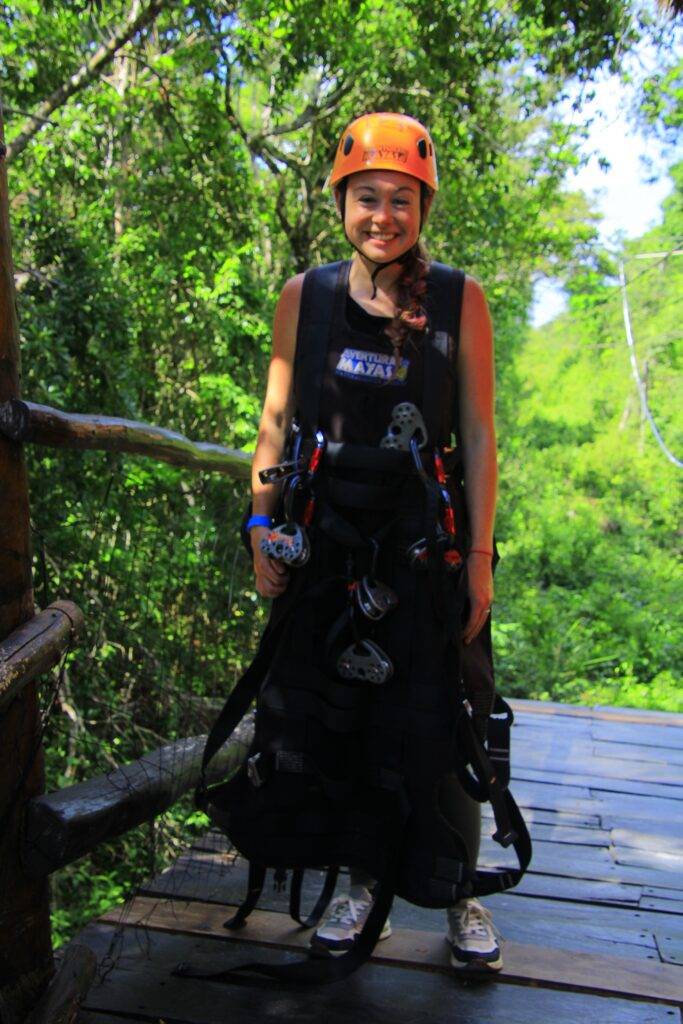
Prepping for the Ziplines
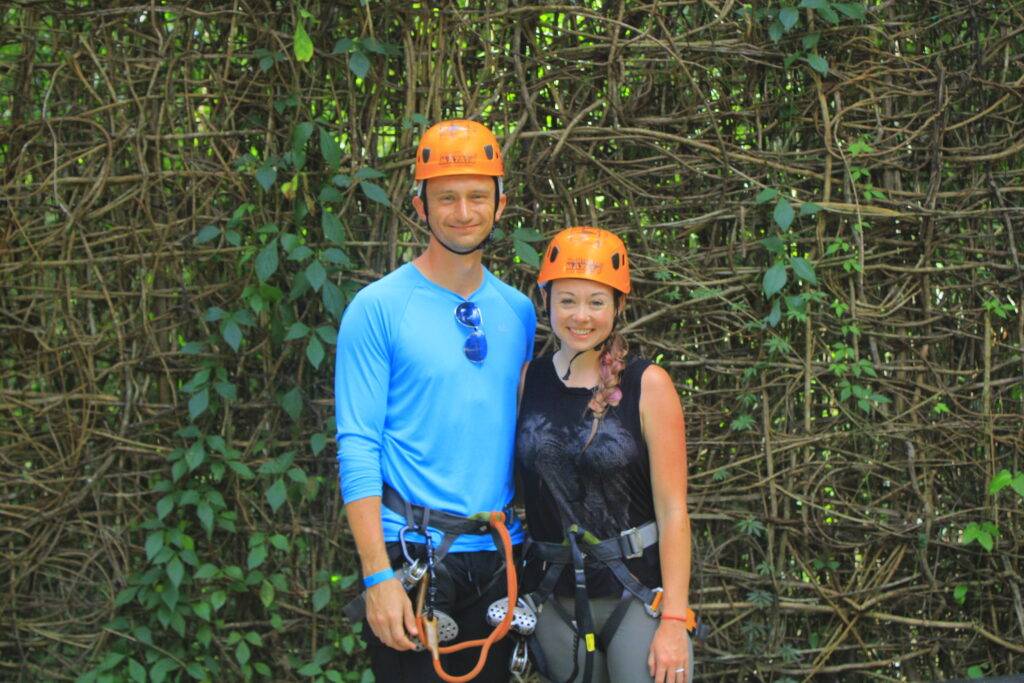
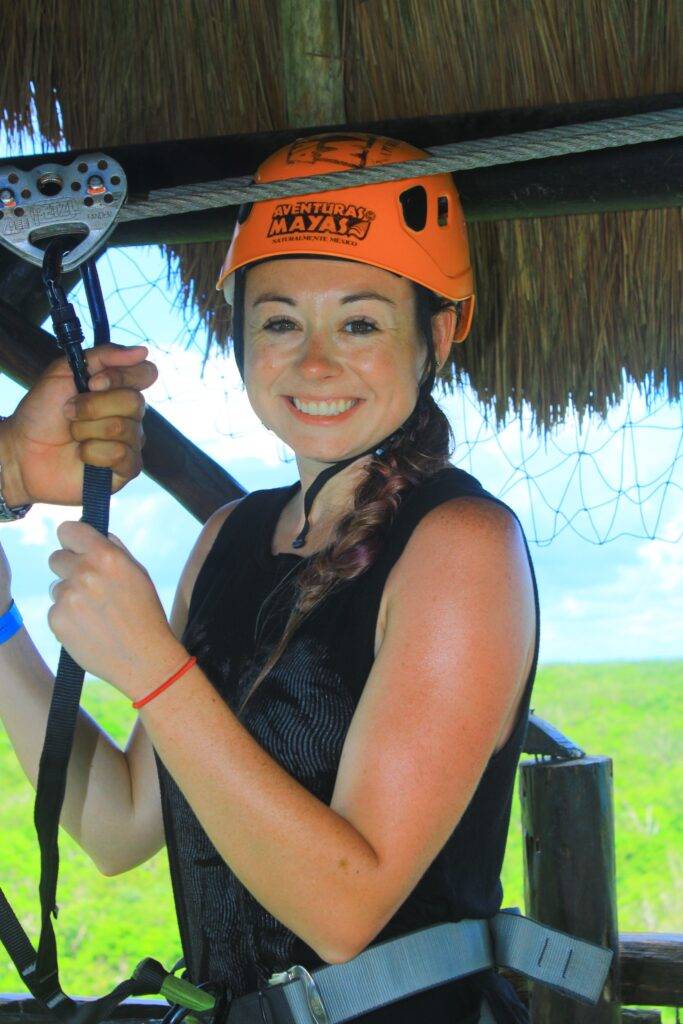
Before getting on the ziplines, we stopped by their equipment hut, where staff members quickly and efficiently set us up with the right size harnesses and helmets. Before we continued, another staff member double-checked our straps and connectors to ensure everything was sound.
Our last stop before ascending the first tower was a small alcove where another photographer took our photos. Then, we briefly listened to a safety briefing from another guide.
Enjoying the Ziplines
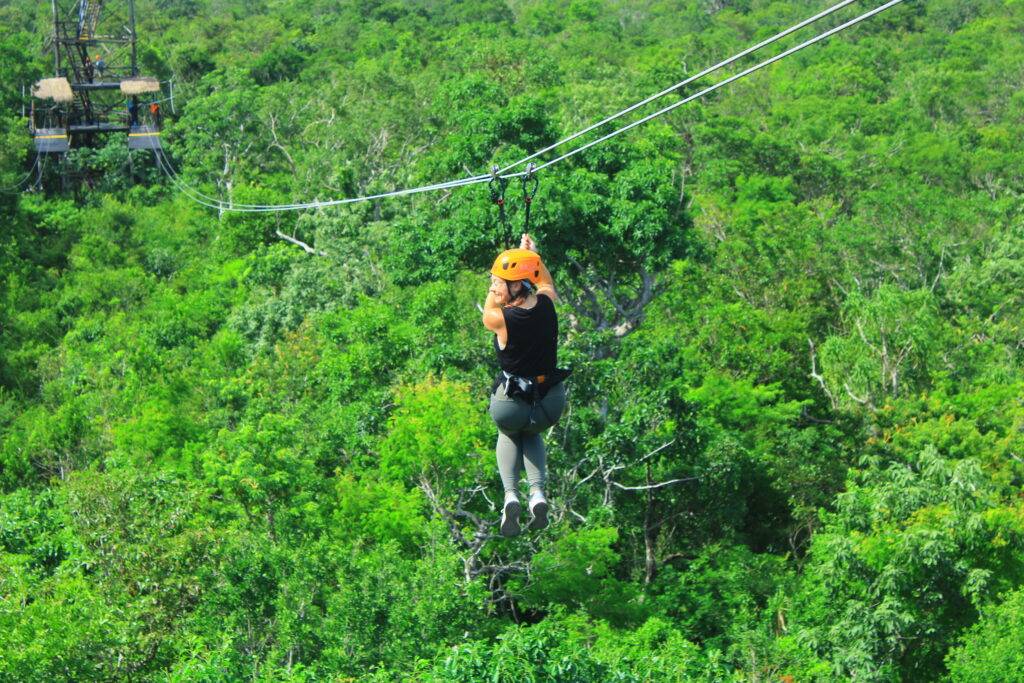
Aventuras Mayas has 5 ziplines and plenty of staff manning each tower. You don’t have to do anything but chill because they take care of braking, hooking you up on each line, and even pushing you off. The only hard part is climbing several stories up each tower to take the next jump. Thankfully, we didn’t have many people behind us, so we never felt rushed.
The first couple of ziplines are pretty straightforward–you jump off a 5-story tower, soar over the jungle, and land about 2 stories up on the next tower, where the staff will unhook you and send you on your way to climb 3 stories and do it again. They encourage you to try flying in different ways, such as upside down, which Daniel always enjoys!
But on the third zipline, you can go two different ways. One way takes you back to the beginning, while the “long way” allows you to try two additional types of ziplining! I highly recommend taking this route because it is so unique!
On the 4th tower, you can zip “Superman-style,” allowing you to soar over the jungle on your stomach! They’ll rig you up with a sizeable blanket-like harness so you can lie on your stomach and “fly.” This was so fun, and the zipline was a bit longer, too.

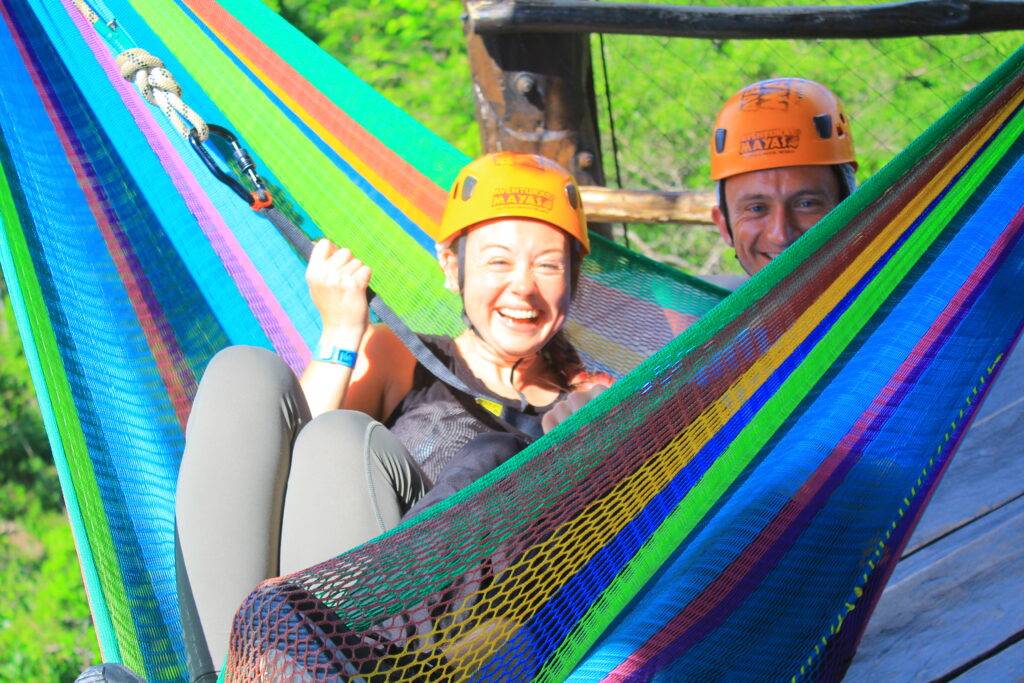
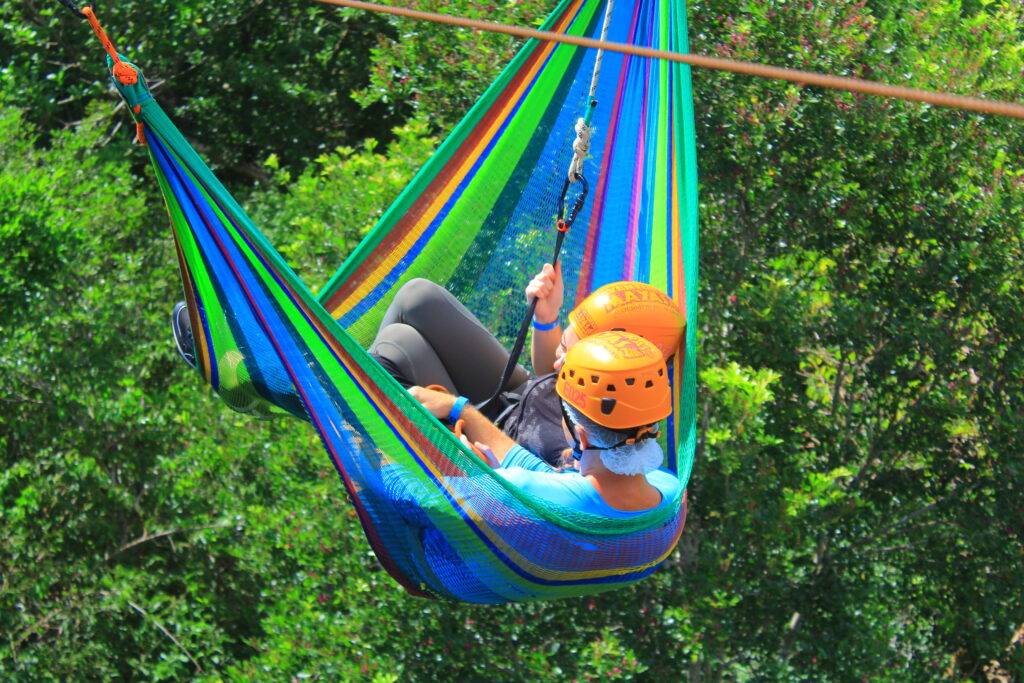
At the final tower, you can do something even more unique and zip in a hammock! Yes, an actual hammock rigged up for the zipline! Don’t worry because they make sure you’re fully harnessed and locked into the ziplines in multiple ways for safety. But I particularly loved this because Daniel and I could go in the same hammock together.

Rapelling
After we finished this zipline, we could go to lunch or rappel. I really wanted to try rappelling again because it’s been a while, so Ivan led us on a short trek through the jungle to another tower, where we climbed up 5 stories once again.
Unfortunately, this wasn’t quite what I hoped, and given the choice again, I would skip this part. You just jump off the tower, and your guide slowly lowers you to the ground. You don’t technically rappel because you’re just hanging in the air the whole time. It only took about 10 minutes total from our day, but it just didn’t feel worth it.
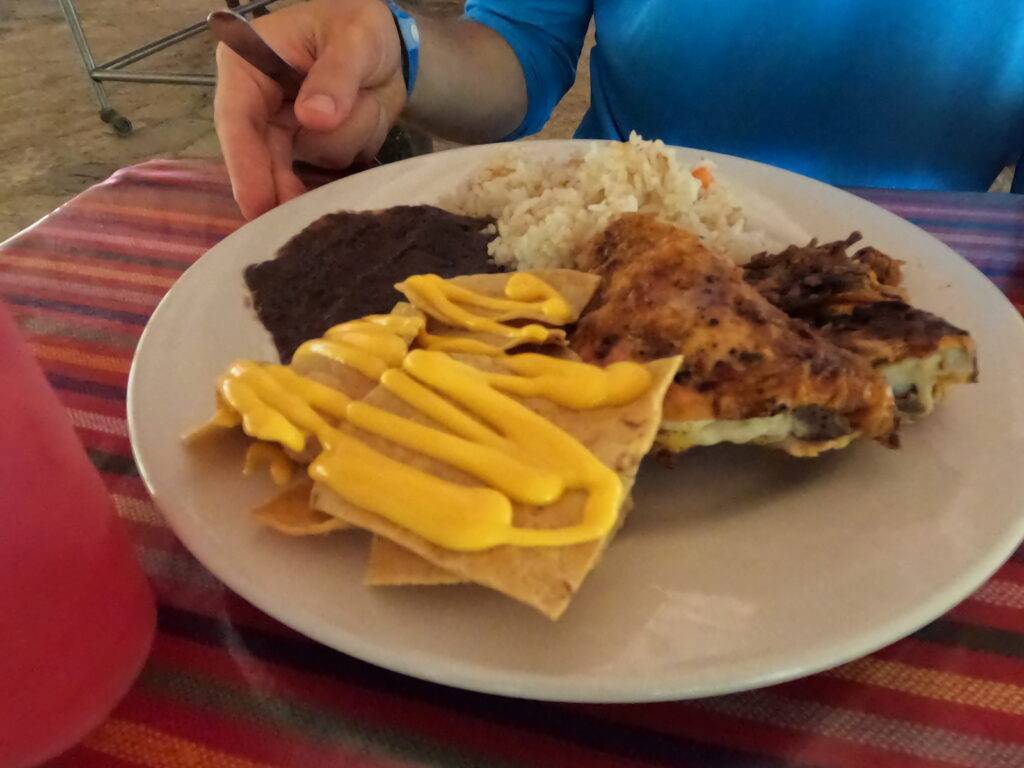
Tulum Xtreme Buffet Lunch
After we finished rappelling, we returned our harnesses and helmets to the staff and had about 30 minutes to use the restrooms and eat lunch.
Lunch is in a small building with a little buffet line and salad bar. The food is traditional and tasty, featuring refried beans, grilled chicken, rice, chips and queso, and salads. They also have some fruit-enhanced waters, which taste particularly refreshing after being in the sun!
Touring Tulum National Park
The final portion of the tour takes place at Tulum National Park. After we finished lunch, browsed the gift shop, and bought a photo package ($55 for the cenote and zipline photos), we hopped back in the van, and Ivan drove us to Tulum National Park. There, he transferred us to a different guide, Ober, who ensured we had all the necessary entrance bracelets and passes before guiding us through Tulum.
Entering Tulum National Park
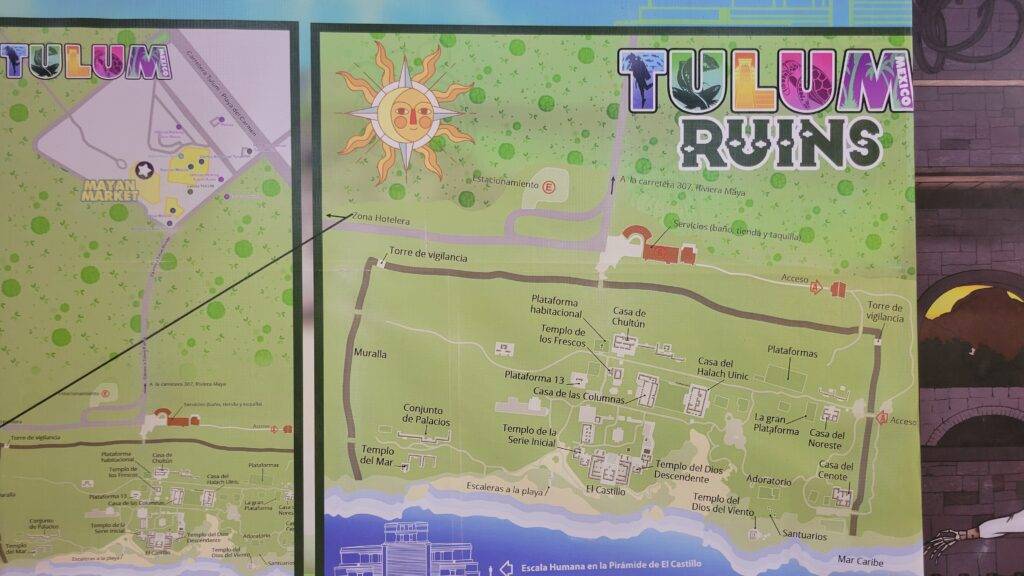
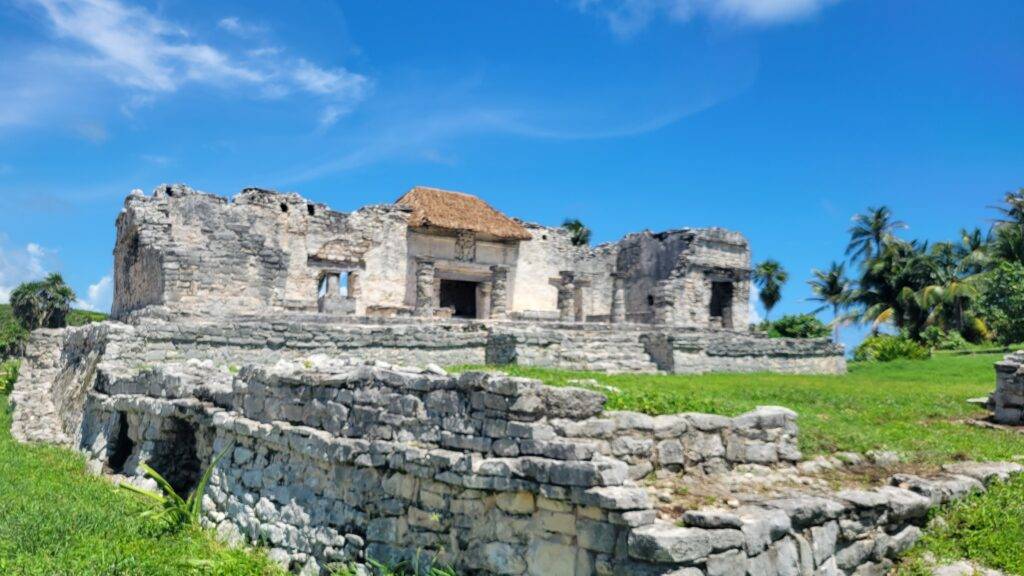
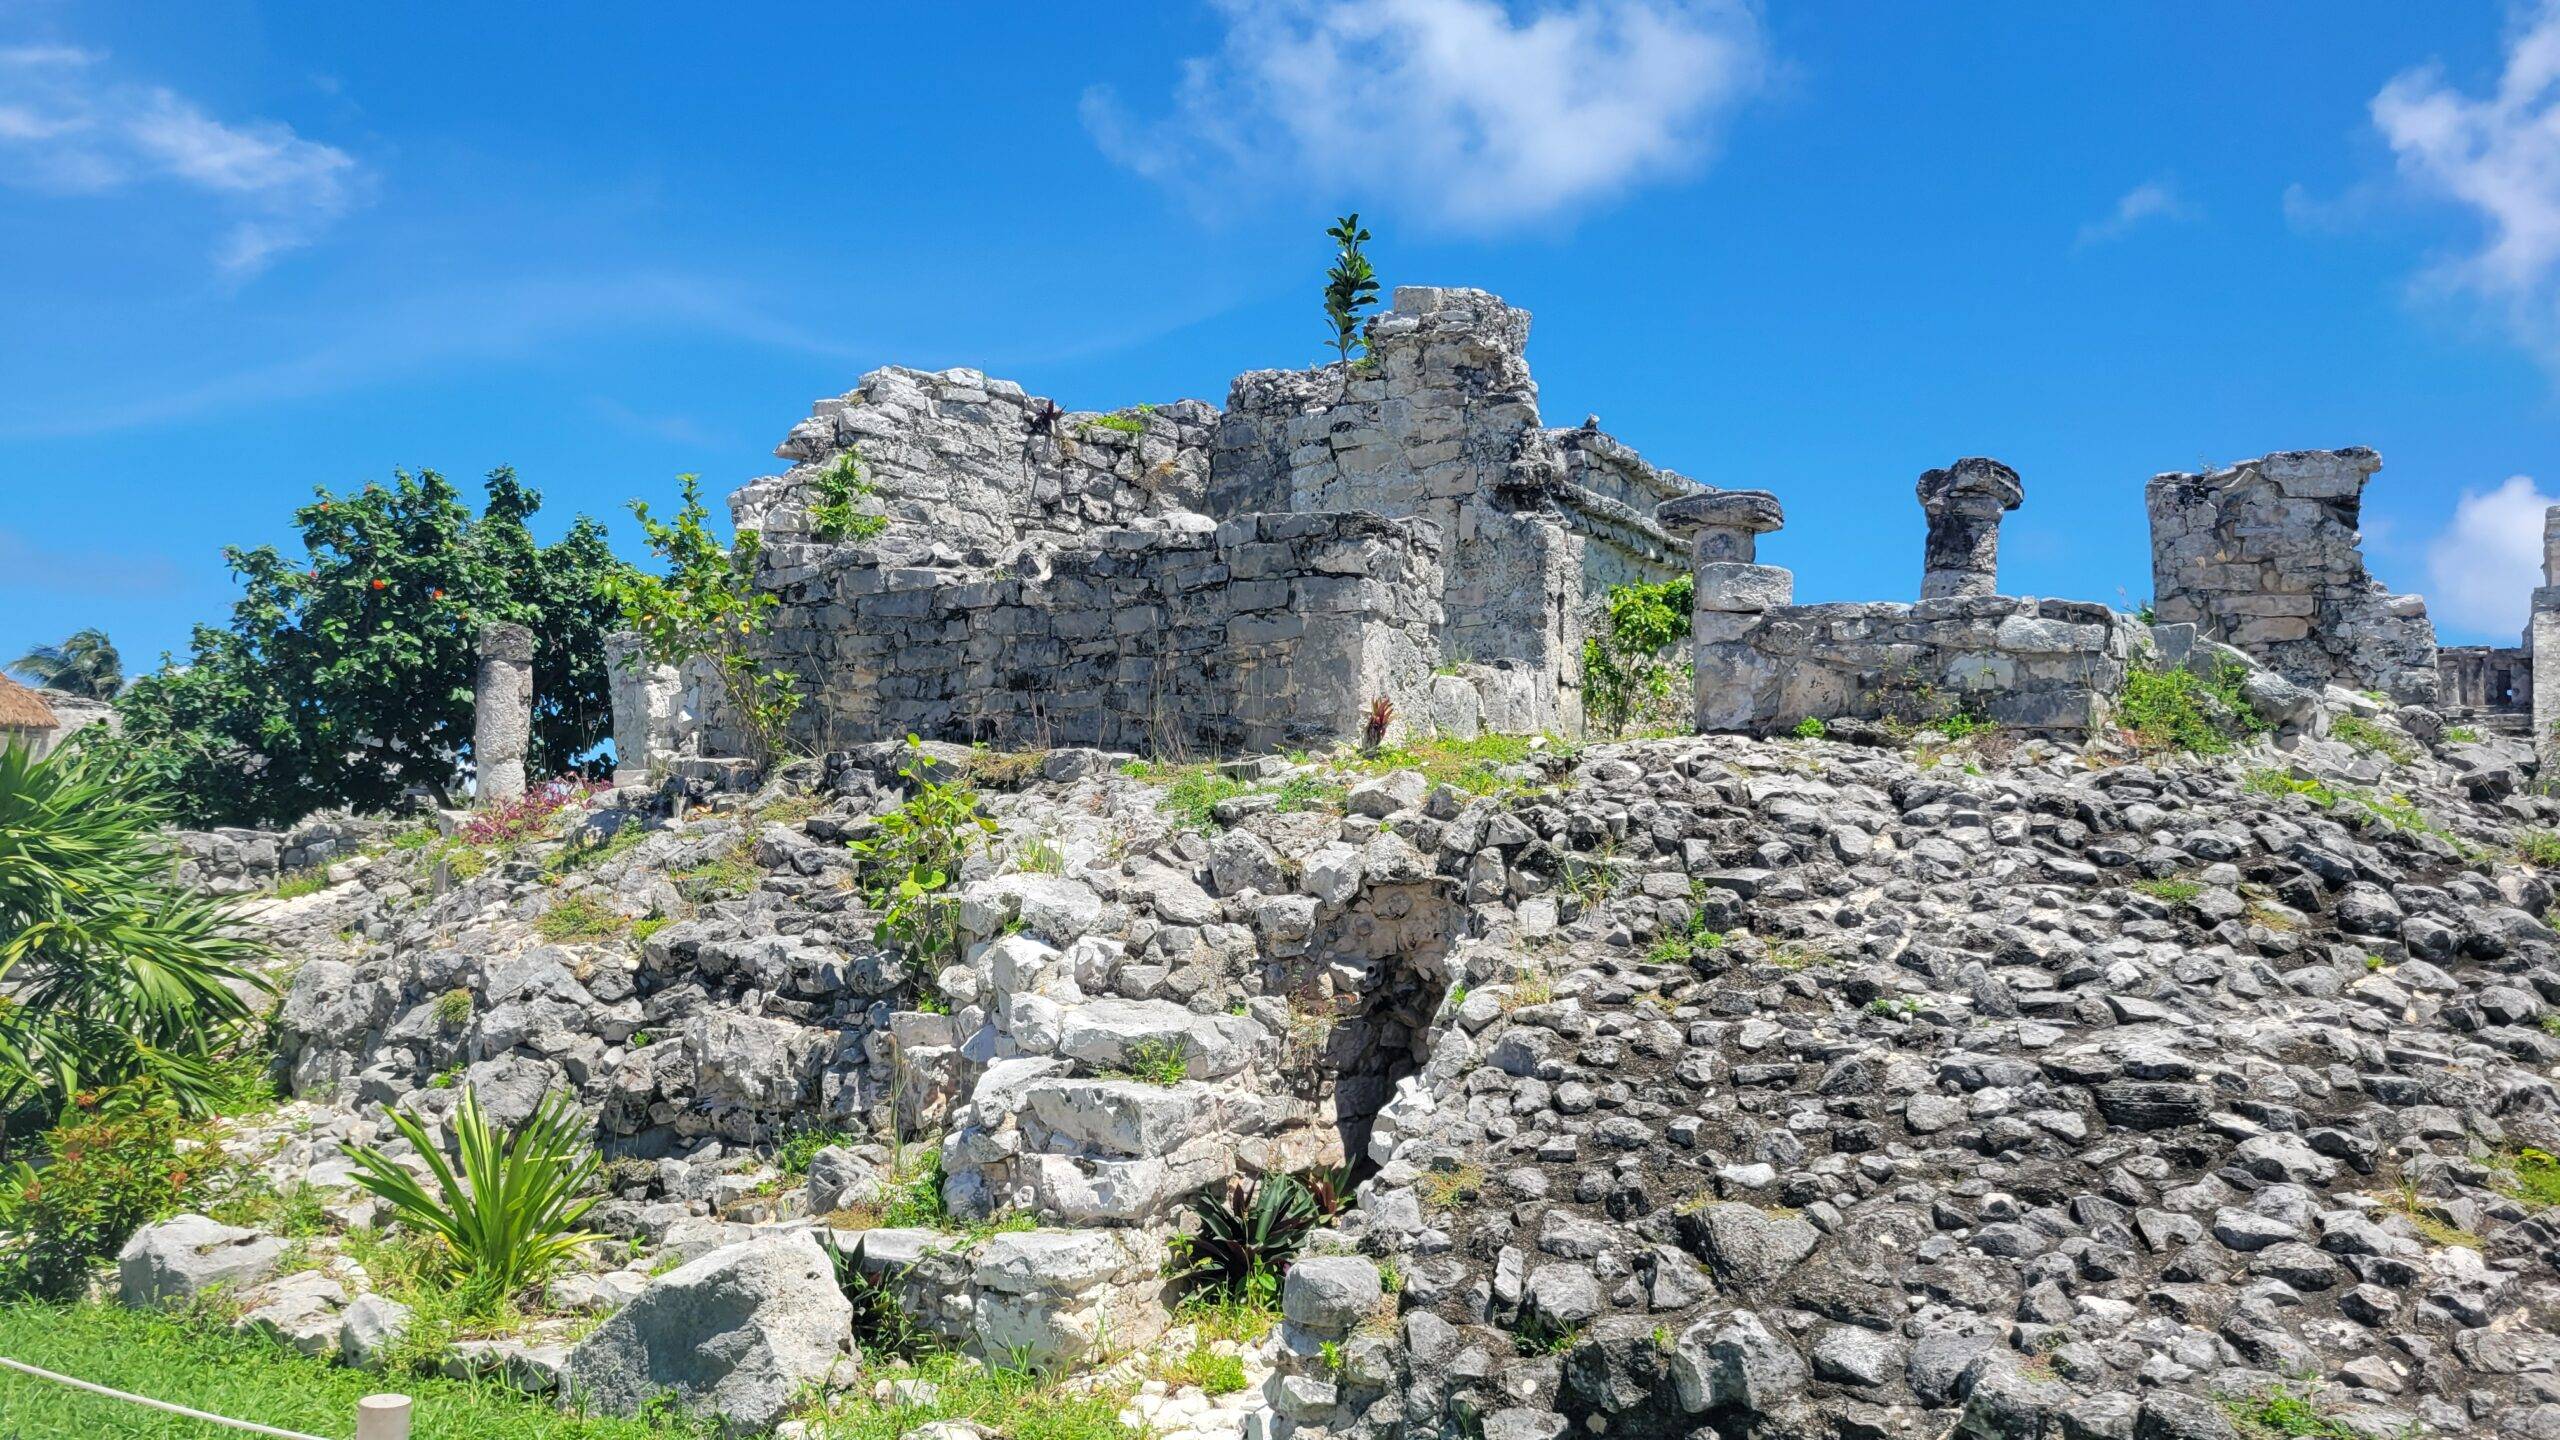
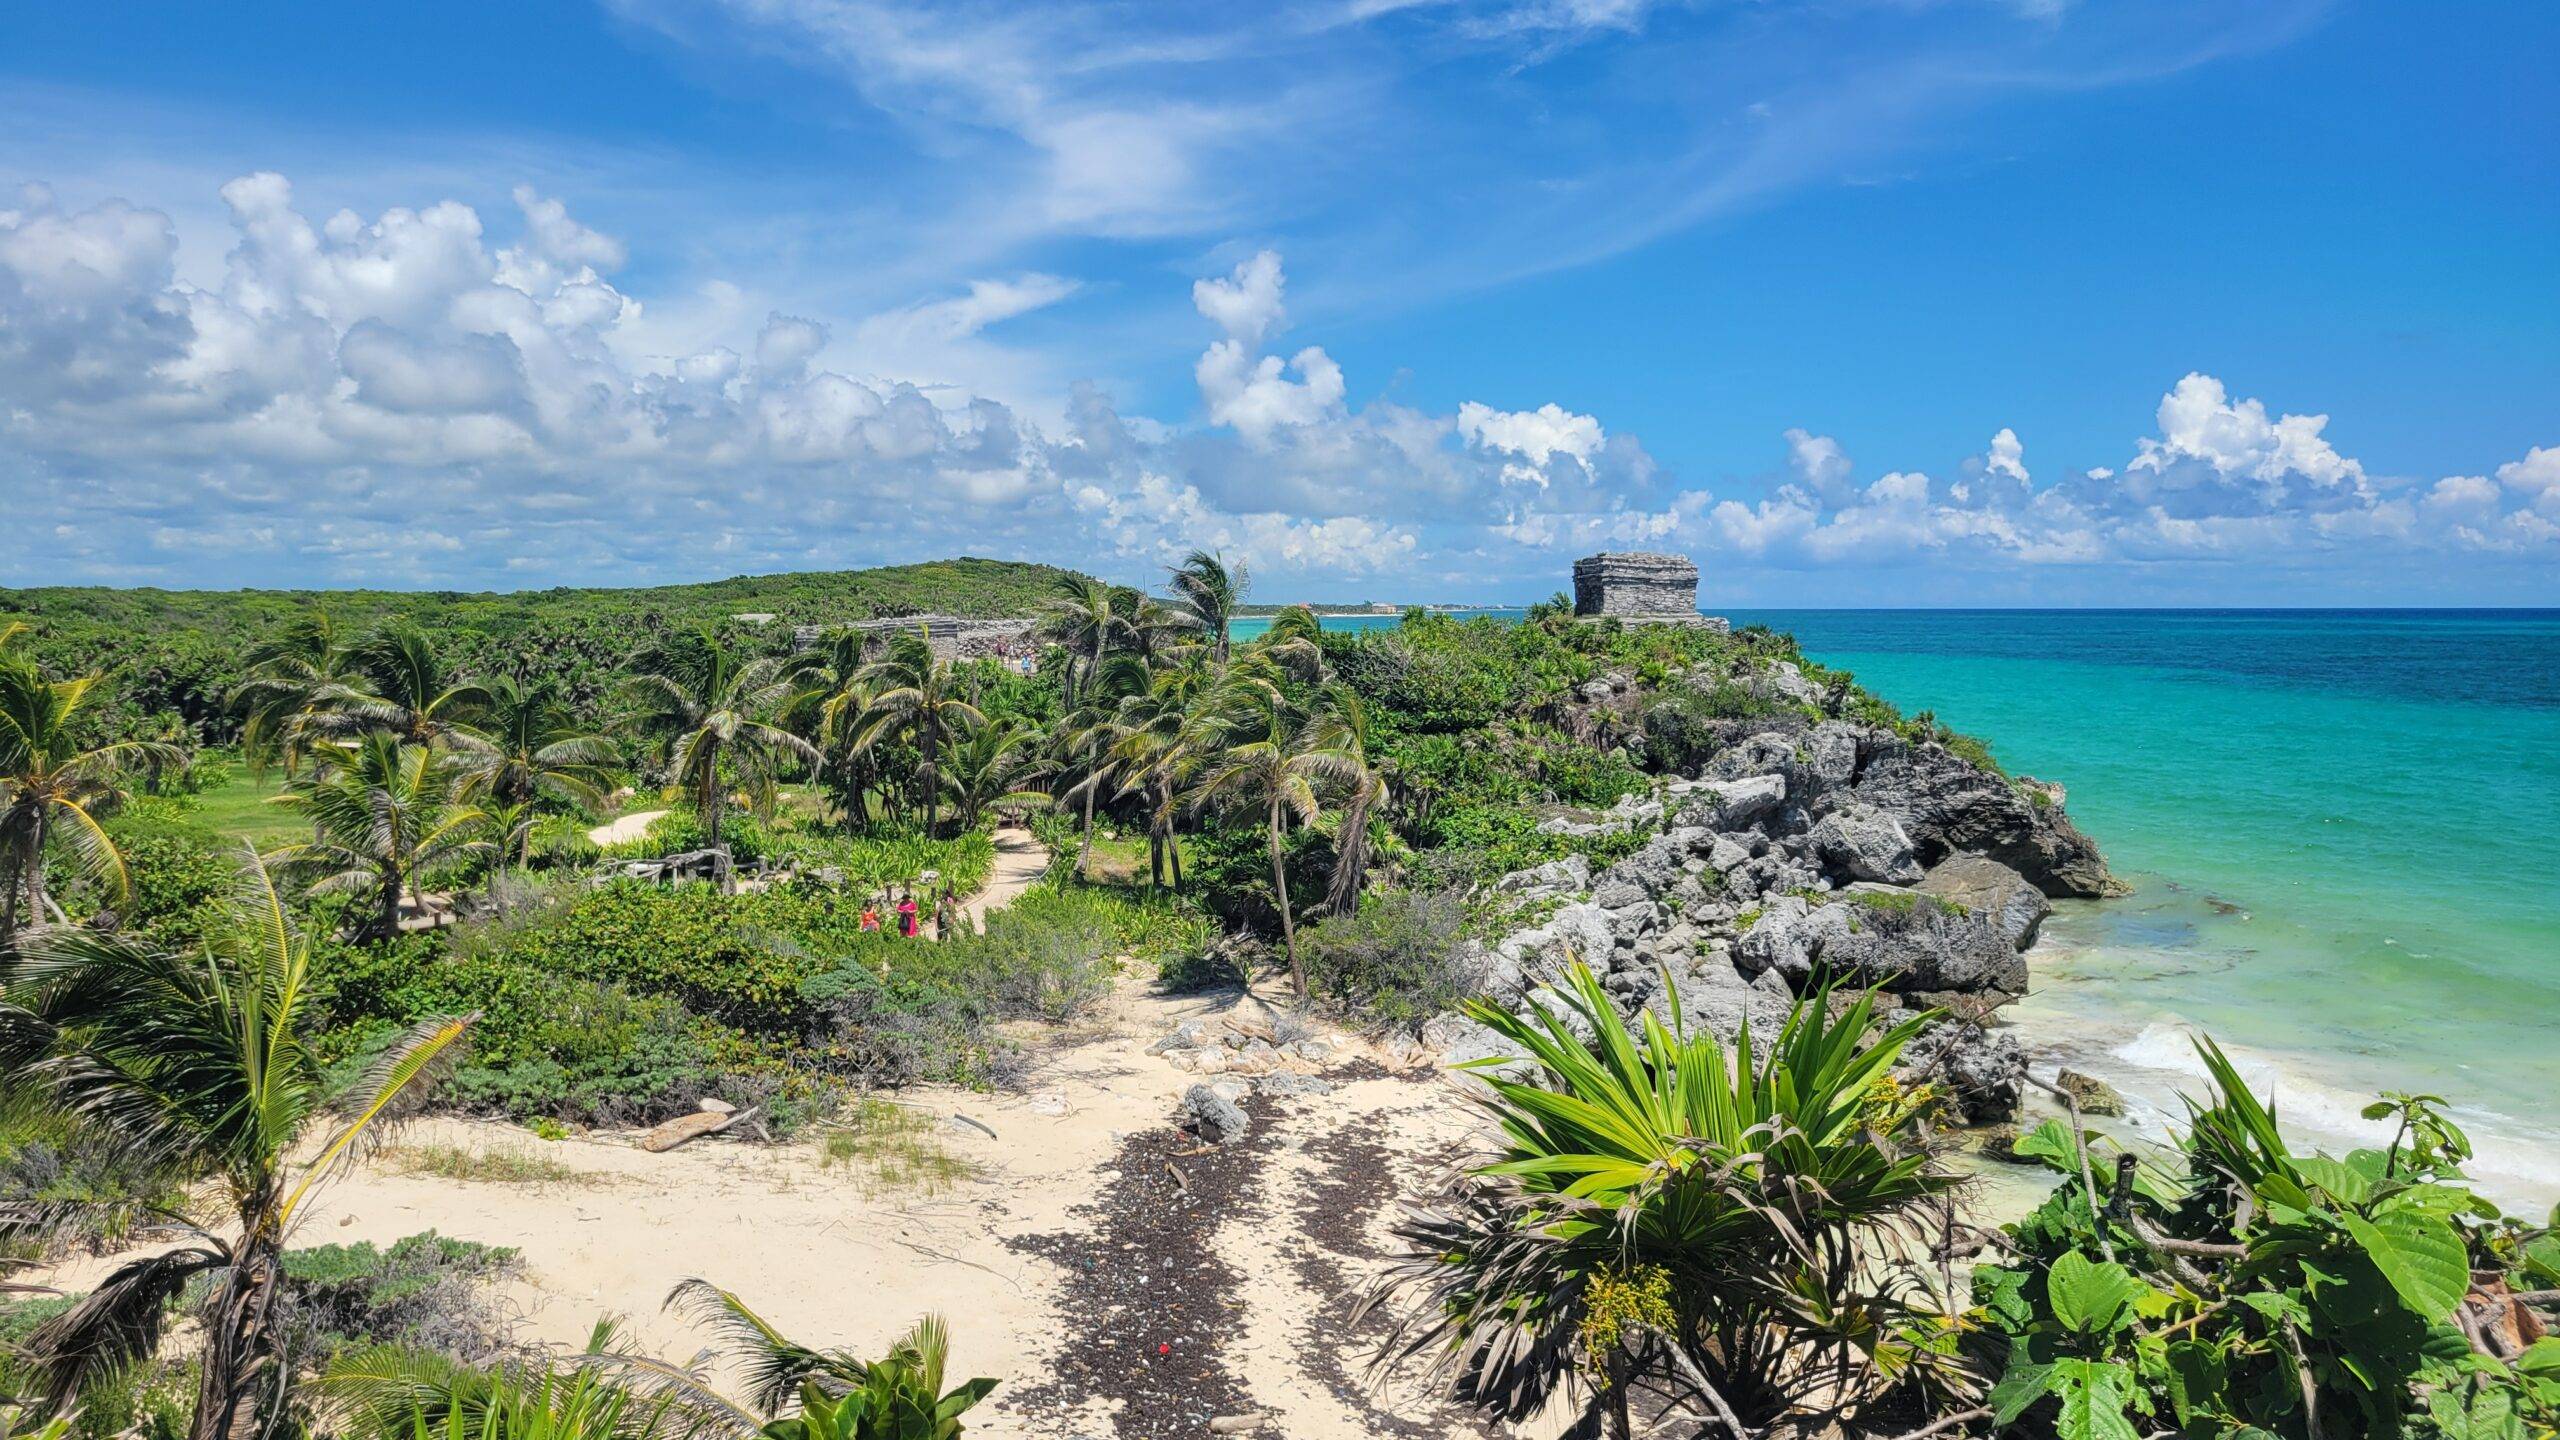
I do want to point out that Tulum National Park was not what I expected—at least not in the beginning. We entered the park through a large welcome center with tons of souvenirs before exiting into what I can only describe as a tourist village. It’s called the Mayan Market, and there were shops and restaurants everywhere and people dressed in vibrant costumes whom we could pay to take a picture with.
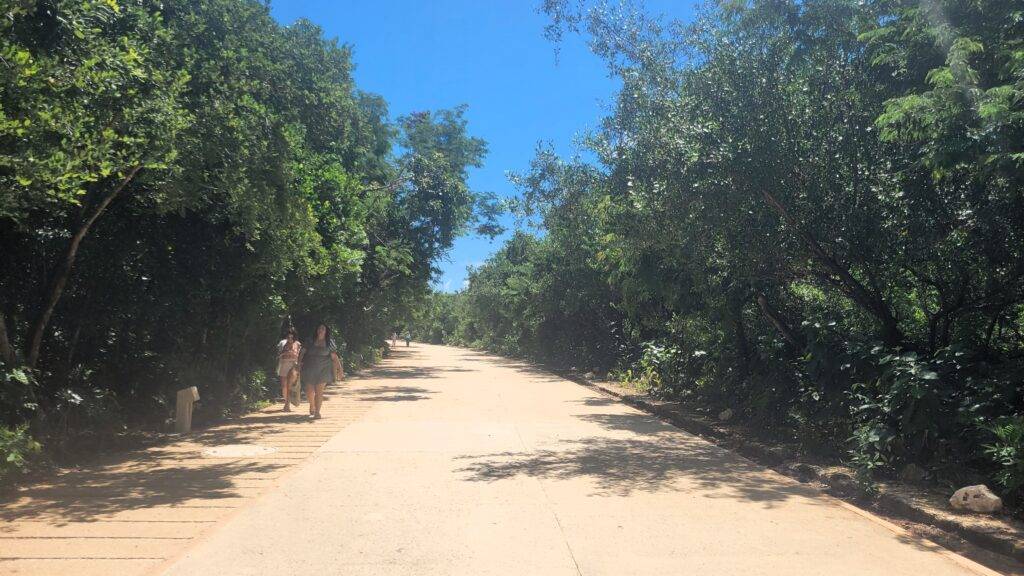
It took several minutes to walk through the market, and then we had to walk down a long pathway to reach the actual ruins. You will have 45 minutes at the end of your tour to explore on your own but keep in mind that you’ll need at least 10 of them to return to the welcome center.
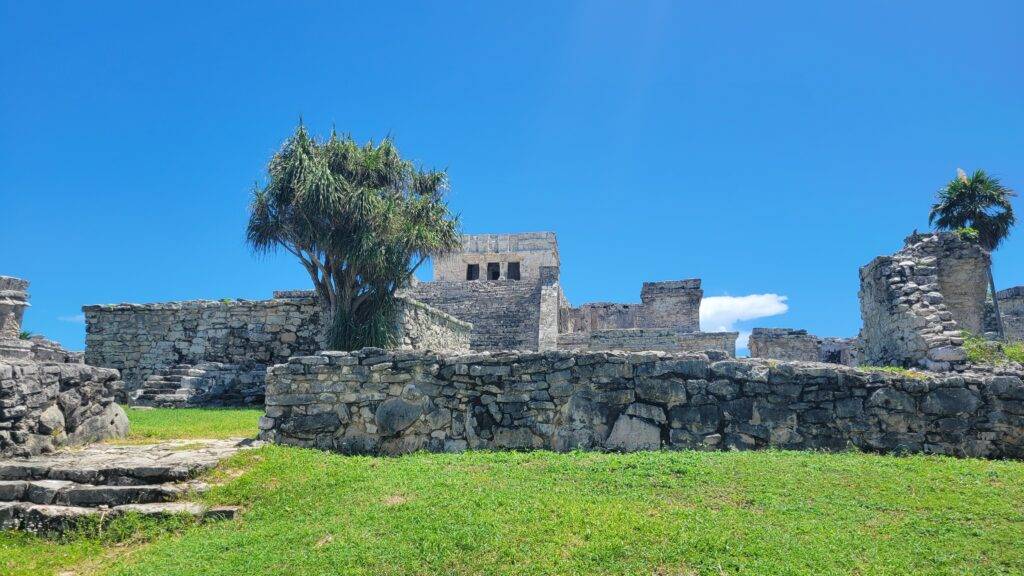
Touring Tulum National Park
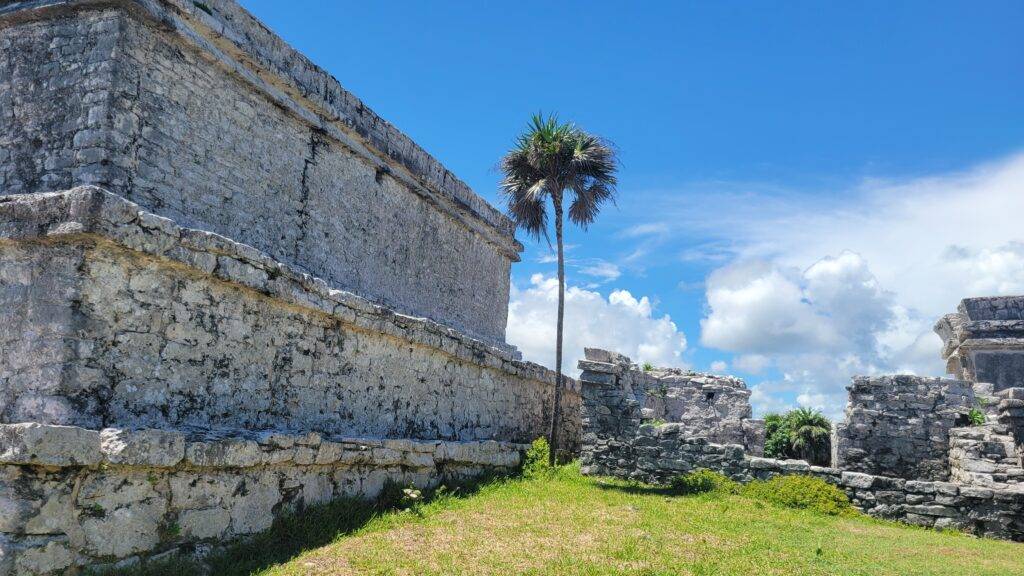
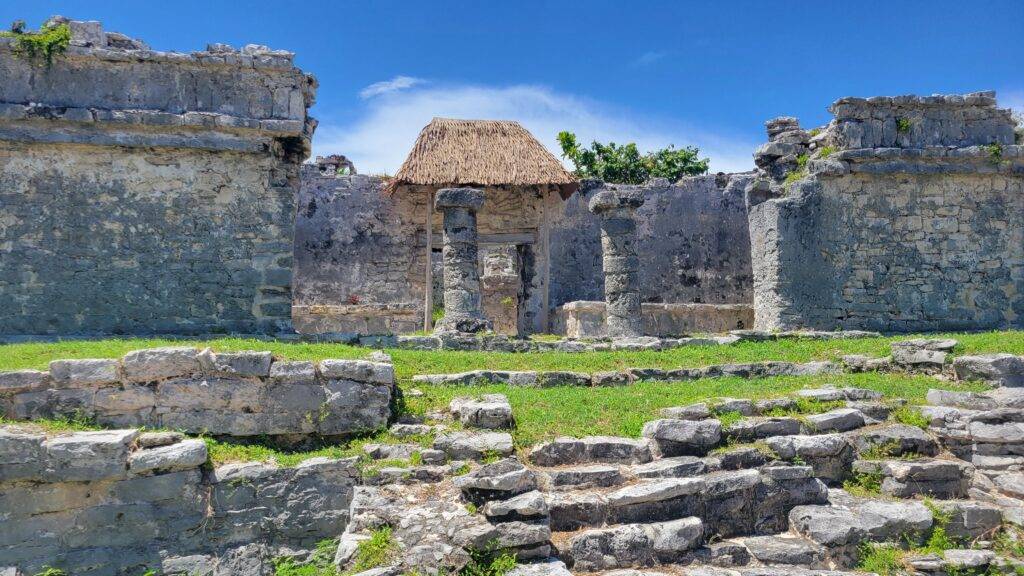
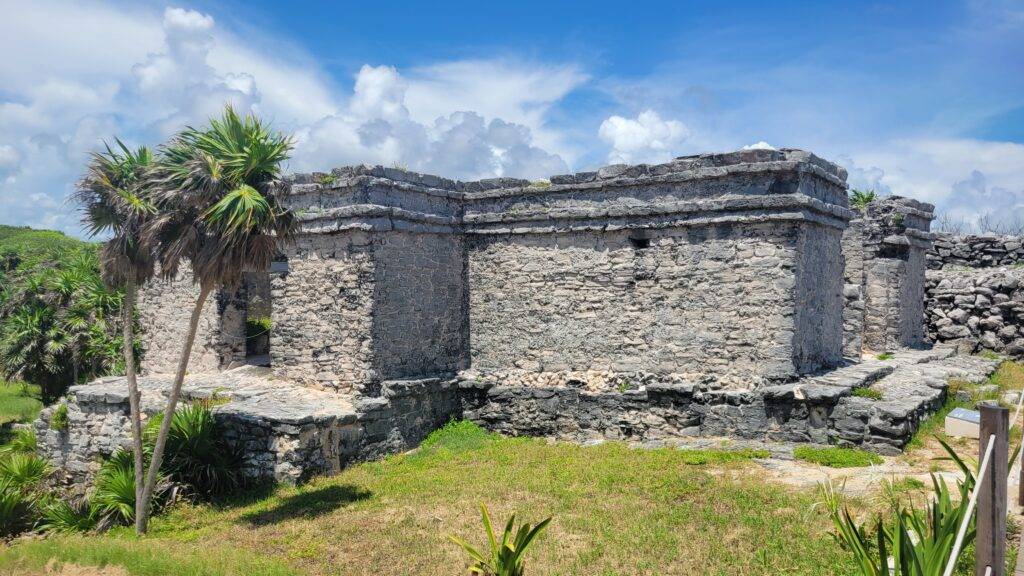
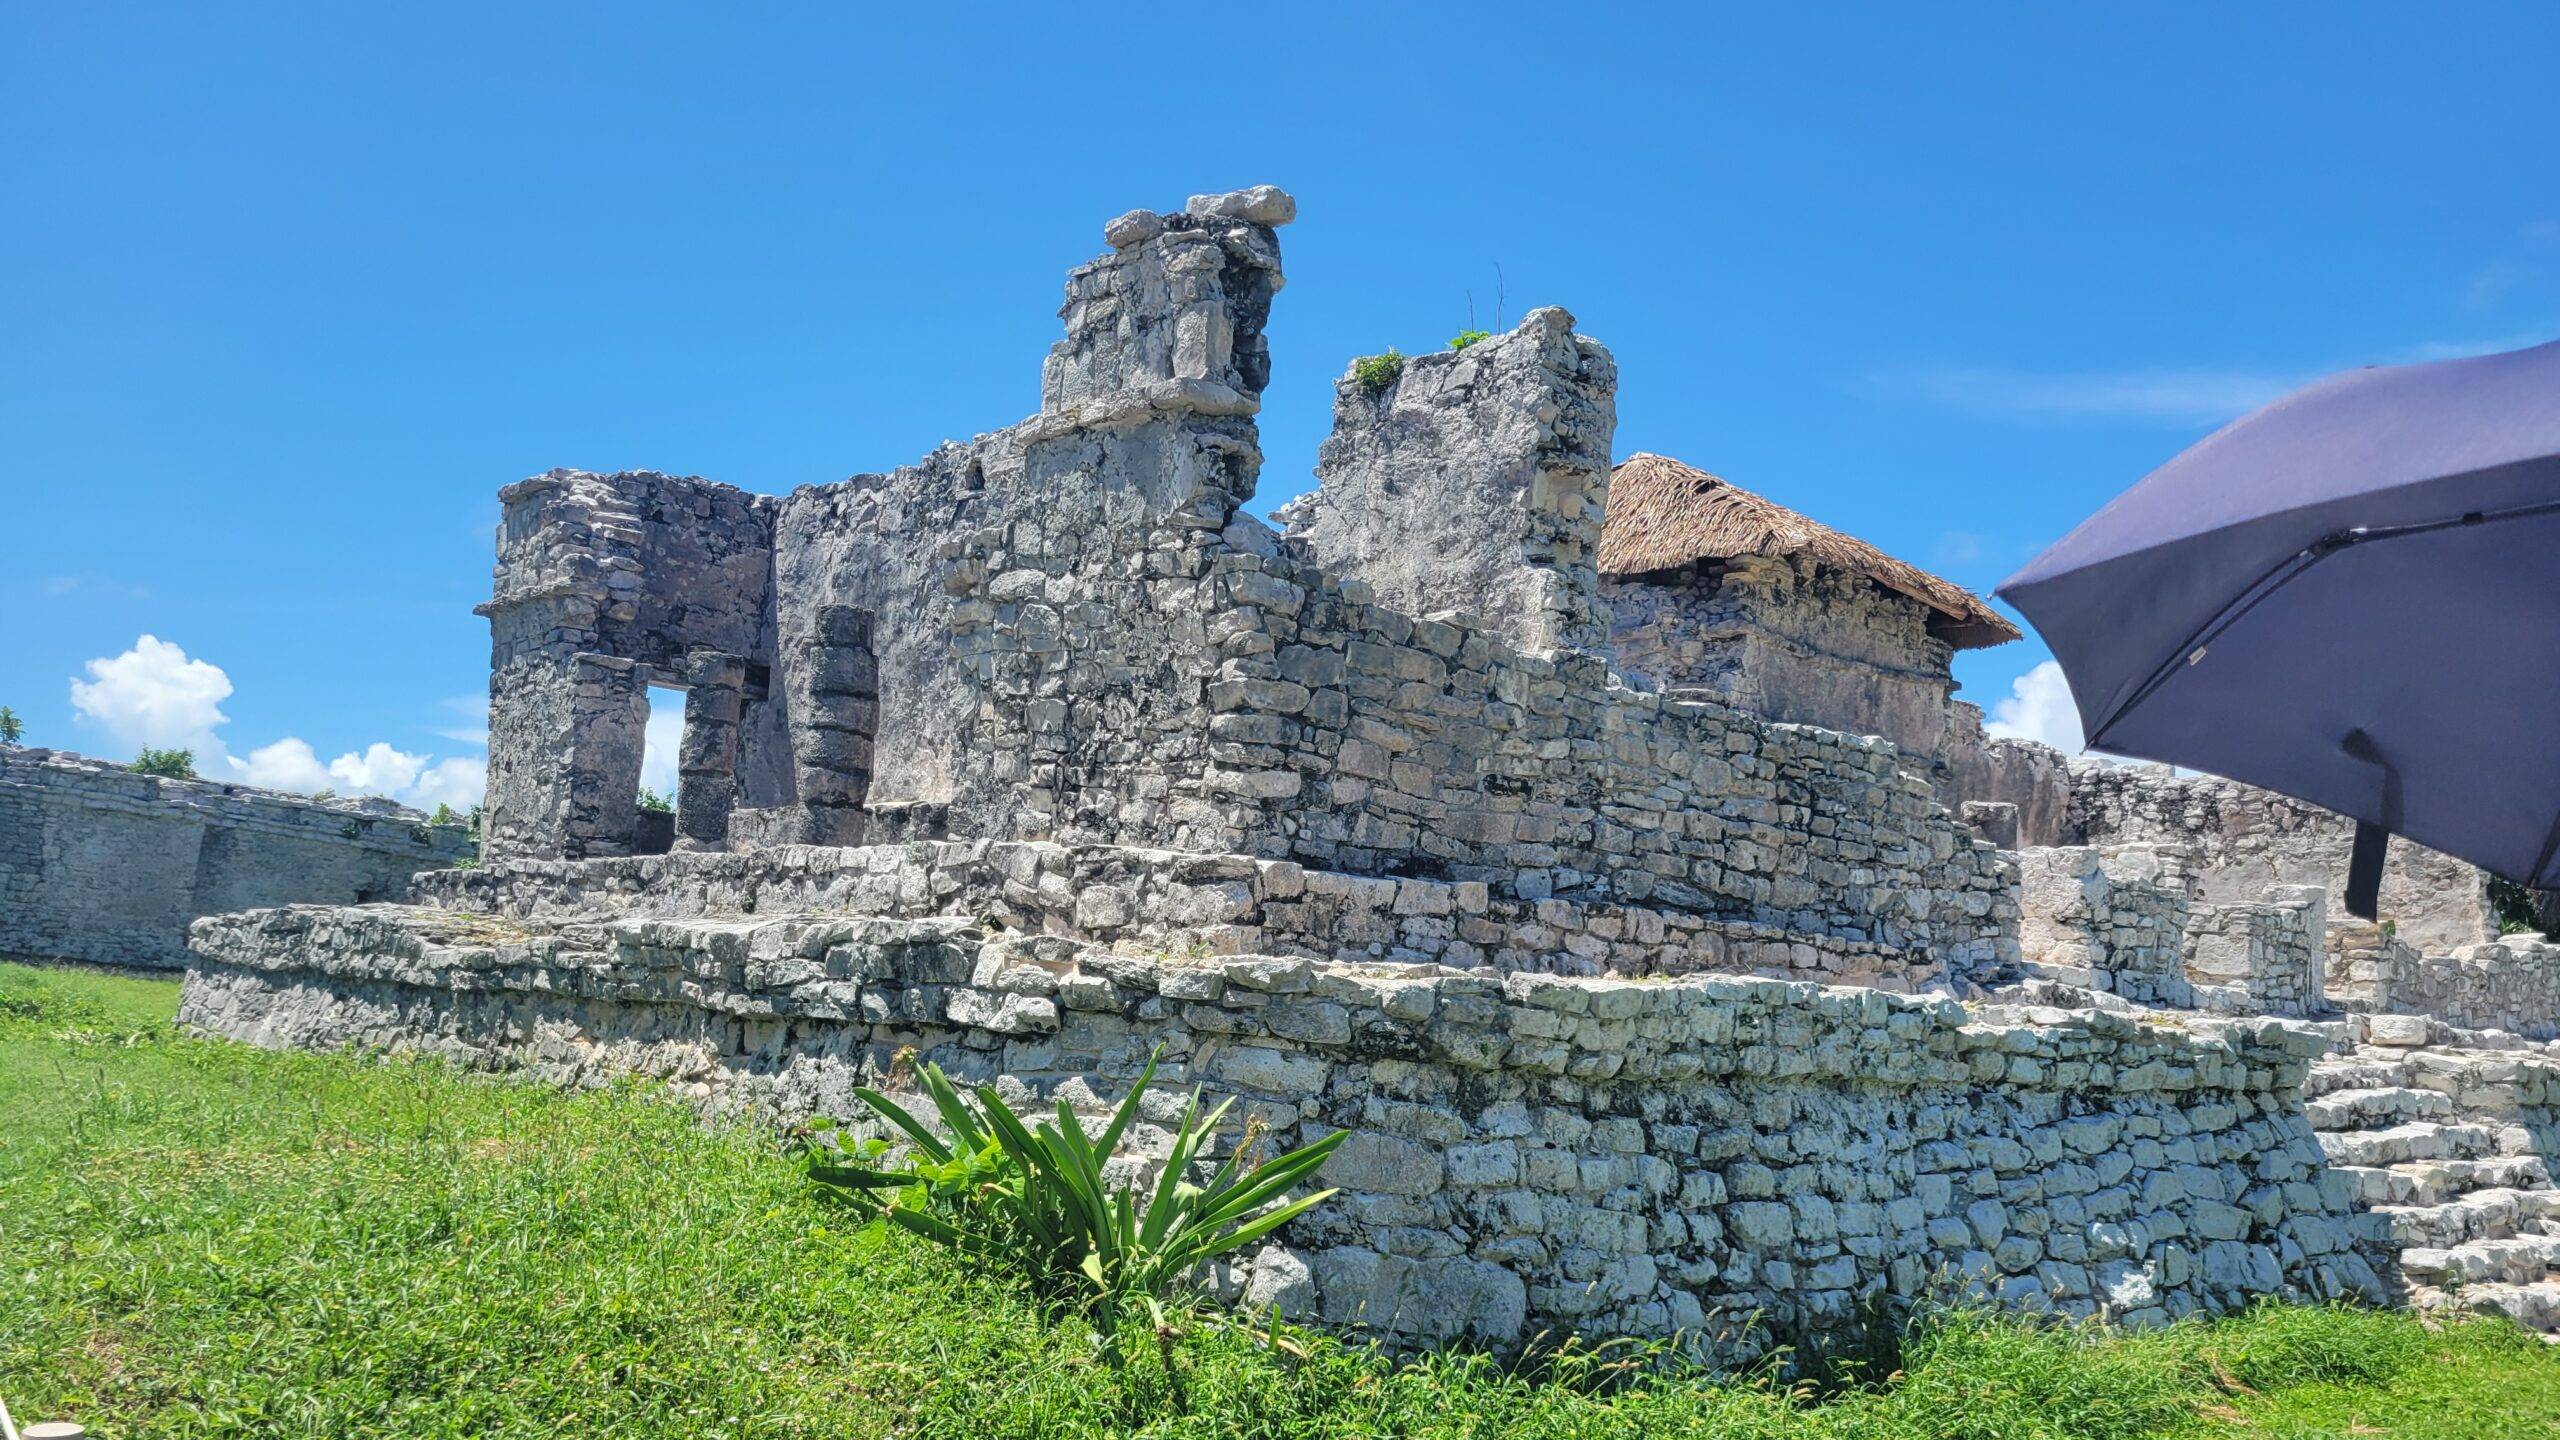
Our guide, Ober, had so many wonderful insights about Tulum. He is Mayan, and so he taught us several Mayan words and phrases as we walked, and had lots of knowledge of Mayan culture, both surrounding Tulum and modern day. It was so fascinating to get his insights as someone directly connected to the culture!
We spent about 45 minutes with Ober, who led us to some of the most notable buildings, explained the significance of some of the carvings, and told us that the city’s real name was Zama, which meant dawn.
At the end of the tour, he gave us instructions on returning to the welcome center and told us we had 45 minutes to explore and meet back up with Ivan.
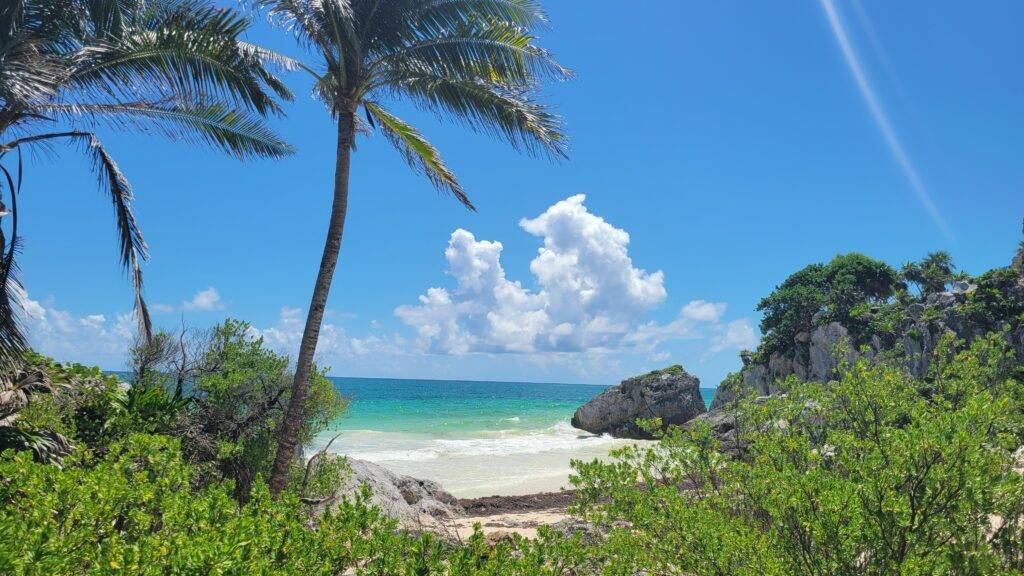
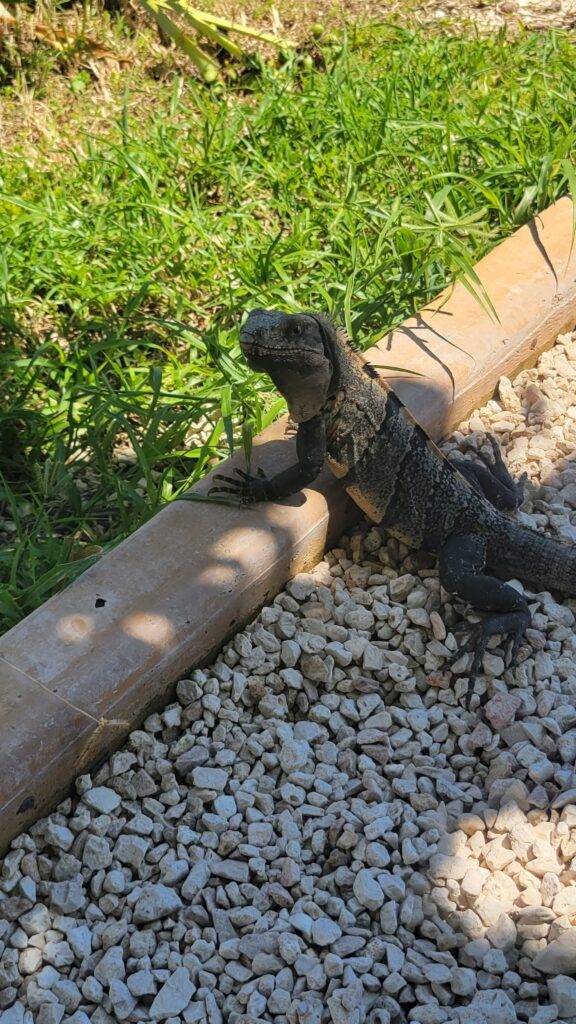
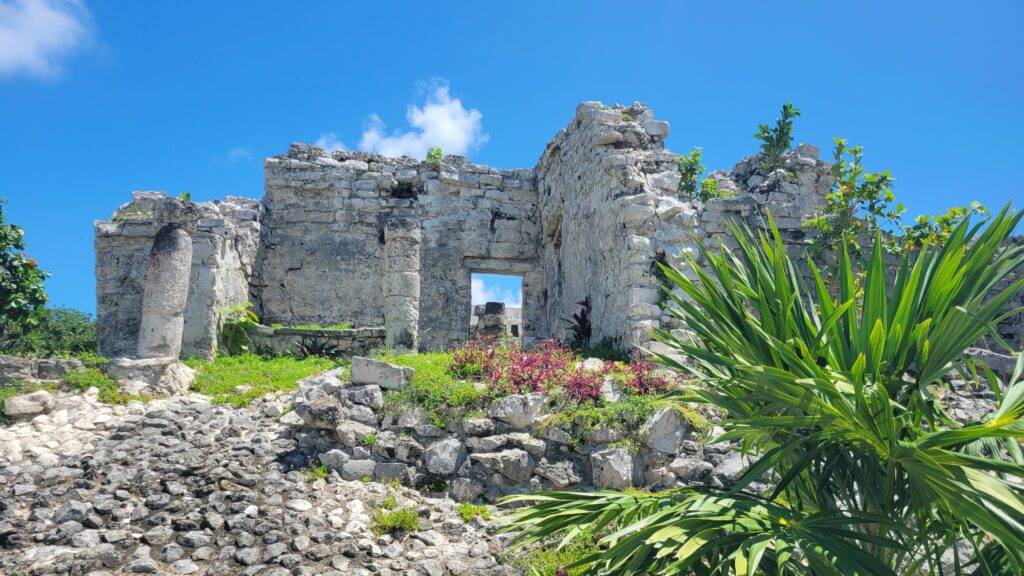
This 45 minutes absolutely flew by! There was so much to see beyond what Ober had shown us, and we were absolutely mesmerized by the gorgeous coastline, so we lost quite a bit of time just trying to take in the views. I was also very distracted by all the iguanas lounging around with absolutely 0 cares in the world, haha!
We were able to speed run most of the ruins, but I definitely could have used another 45 minutes here.
We ended up half-running back to the welcome center and completely bypassed the Mayan Market. That was pretty disappointing, so I definitely would have liked more time on this part.
From here, Ivan drove us directly back to our hotel. I believe we were back by 2 pm, leaving us with plenty of day left to relax! I was happily surprised because I expected this to take the whole day.
What to Bring to Tulum Xtreme
To wrap things up, I want to share some quick tips on what to bring to get the most out of your tour.
- An action camera with a harness or head strap and floating handle–You can use your action camera in the cenote, but they will only let you use it on the zipline if you have a harness. We had a clip, but they wouldn’t let us take it like that.
- Biodegradable sunscreen–Mexico has extremely strict sunscreen laws, so make sure your sunscreen meets the regulations.
- Sun protection–I always bring a sun protection shirt or hoodie on these kinds of vacations, but an umbrella or hat is also a good idea during the ruins tour.
- Swimsuit, towel, and flip-flops–You’ll need all these for the cenote.
- Change of clothes–We didn’t need this because we did the cenote first, but if you do the ziplines or ruins first, you may want something fresh to change into after your cenote swim.
- Comfortable sneakers–You’ll be climbing up a ton of stairs for the ziplines and walking all over at the ruins, so wear comfortable, breathable sneakers.
See Our Tulum Xtreme Tour in Action on YouTube!
Closing Thoughts on Tulum Xtreme
We had such an incredible time on this tour with Aventuras Mayas! From start to finish, everything was very professional and enjoyable, leaving us with wonderful memories. It was a great mix of adventure and sightseeing, and I definitely felt like we got our money’s worth.
If we ever return to Riviera Maya, I would be very interested in booking another tour with Aventuras Mayas to try their ATVs or snorkeling in a lagoon because this experience was so good.
I hope this post helped you get a great idea of what to expect on your own Tulum Xtreme tour! If you have any questions, please drop them below, and I’ll get back to you ASAP. I’d also encourage you to check out my YouTube video to see lots of footage of the tour.
Interested in following along for more adventures in Mexico and beyond? Sign up for my free newsletter! You’ll get access to a new post each week, filled with helpful tips, tricks, and recommendations to make your vacation planning easier. Plus, some great freebies just for signing up!
Thanks so much for stopping by! Don’t forget to browse the blog to see if any other adventures spark your wanderlust! Until next time, happy travels!